In preparation for camping, I made patterns from a pair of pants that fit generously, cutting the legs short just above the knees. I cut gray colored fleece and sewed the pieces together. A piece of waistband elastic completed the job. I made custom leg warmers from the same fleece, cutting the fabric without a seam allowance. I used a seam allowance of 3/8". I used some 3/4" webbing and a low profile center release buckle to attach each to the underside of shorts in the front of each leg.
Arm warmers also came together from lichen colored fleece.
I made a mitten pattern, producing one gray fleece mitten and a red fleece mitten. Easy fitting mittens, but the next pair must have palm grips, mitten hooks and different color tops and palms.
I walked downtown with backpack and shorts, legwarmers and arm warmers. The arm warmers need a 3" extension at the top end. Leg warmers worked well, and fit well, though a little tight getting on and off over my heel.
The Rayway backpack needs a proper closure for the top, maybe roll top and also needs a frame so that it can carry loads up to 30#. It also needs a softer padding in the shoulder straps. Grab loops on the shoulder straps and maybe even sternum straps.
The north section of the Olympic NP Northwest Coast Trail beckons. Too many appointments this week. Have to cancel at least one!
Sunday, April 27, 2014

Tuesday, April 15, 2014
Northwest Coast Trail, Olympic NP South section
Trip report
Northwest Coast Trail, Olympic NP South section. Before going, check conditions at NP website. See a map of the “official” campsites.
I hiked out from the Third Beach trailhead, up over Taylor Point, then scrambled over rocks and rising surf around a headland near the last low tide for the day. 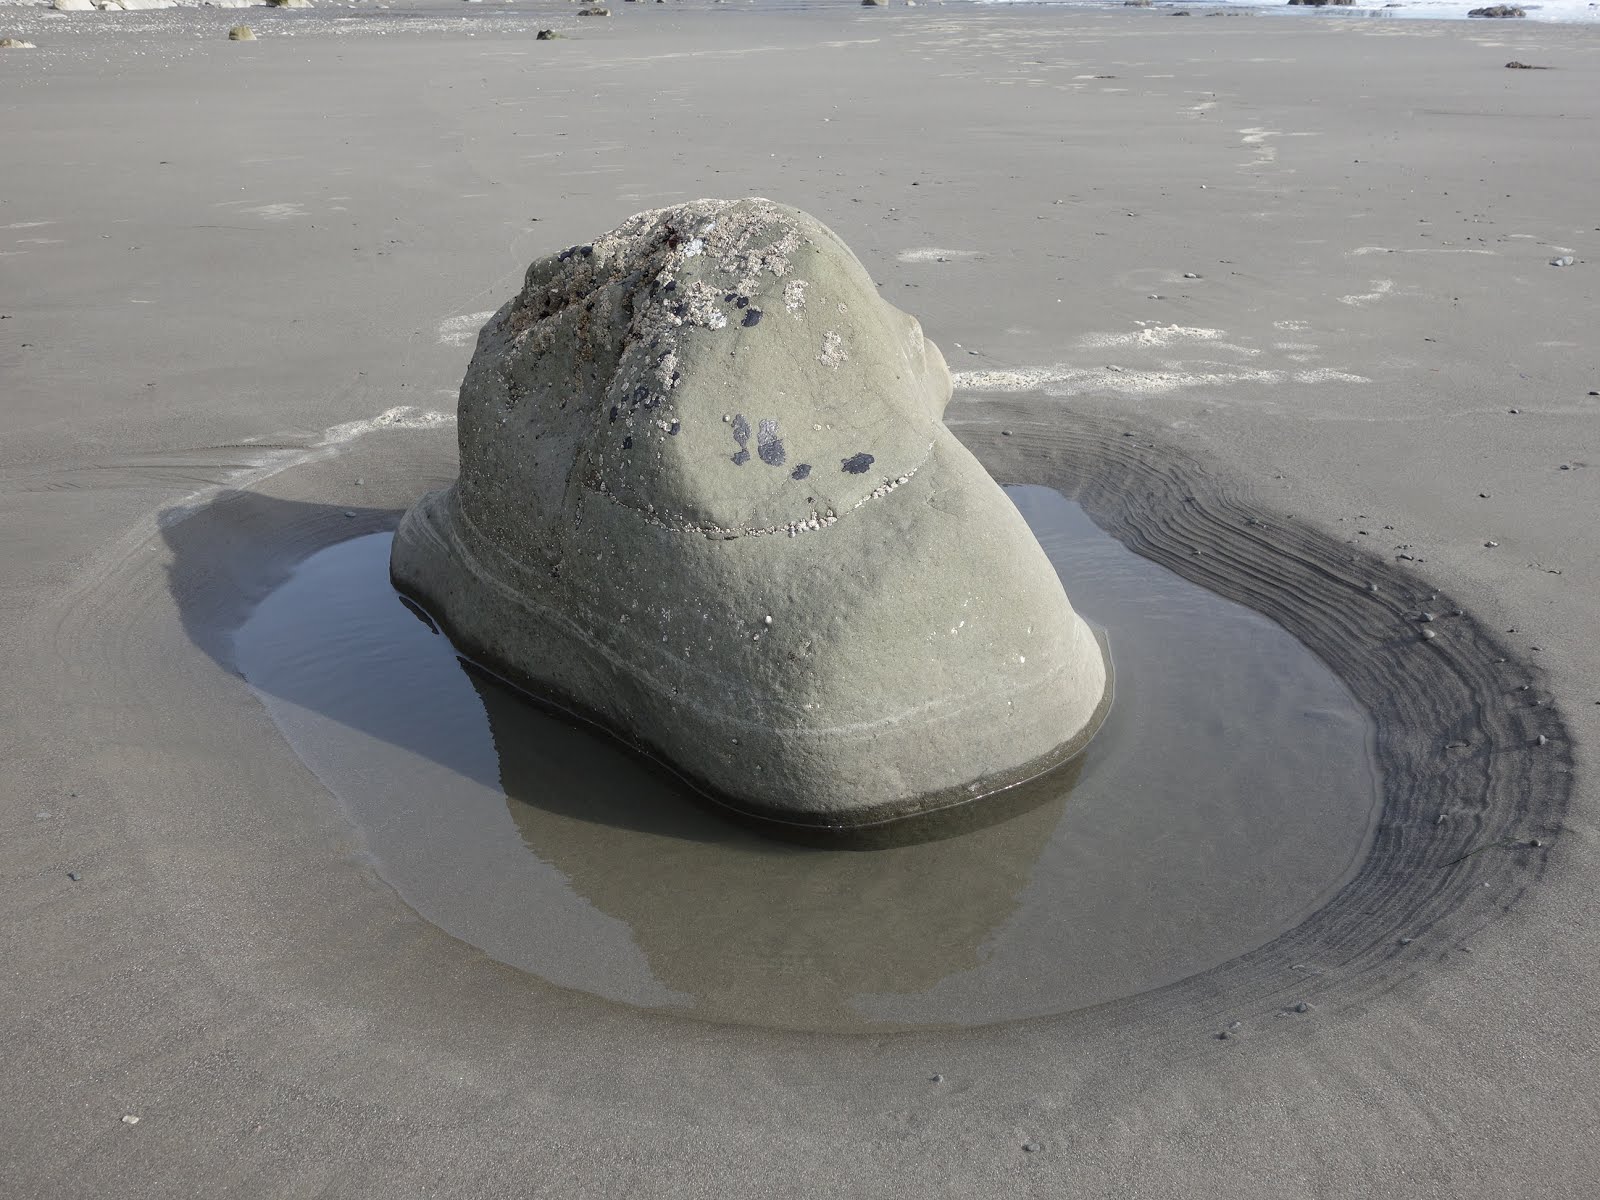 April sun pushed the mercury to ~60 deg F, warm enough for short sleeves when ascending, but if I stopped on the beach, winds made me want to layer up or get going again.
  I passed Scott’s Bluff, Strawberry Point, some fine campsites, Toleak Point, then arrived at Jackson Creek, where my trail guide said I’d find campsites. A huge log jam blocked access to the camps. Many logs moved dangerously when stepped on and some had slick surfaces.
  I walked on, climbing up the headland that would lead to crossings of Falls and Goodman Creeks. Along the trail, I scanned the forest for potential campsites, noting infinite possibilities for hammock camping vs. nearly none for ground camping. I considered camping on the trail itself if I didn’t find a better flat, cleared piece of ground. At about 6 p.m. I found a delightful campsite above Falls Creek under a huge 12 ft tree. An unflavored chicken and pasta dinner almost tasted good.
April sun pushed the mercury to ~60 deg F, warm enough for short sleeves when ascending, but if I stopped on the beach, winds made me want to layer up or get going again. I passed Scott’s Bluff, Strawberry Point, some fine campsites, Toleak Point, then arrived at Jackson Creek, where my trail guide said I’d find campsites. A huge log jam blocked access to the camps. Many logs moved dangerously when stepped on and some had slick surfaces. I walked on, climbing up the headland that would lead to crossings of Falls and Goodman Creeks. Along the trail, I scanned the forest for potential campsites, noting infinite possibilities for hammock camping vs. nearly none for ground camping. I considered camping on the trail itself if I didn’t find a better flat, cleared piece of ground. At about 6 p.m. I found a delightful campsite above Falls Creek under a huge 12 ft tree. An unflavored chicken and pasta dinner almost tasted good.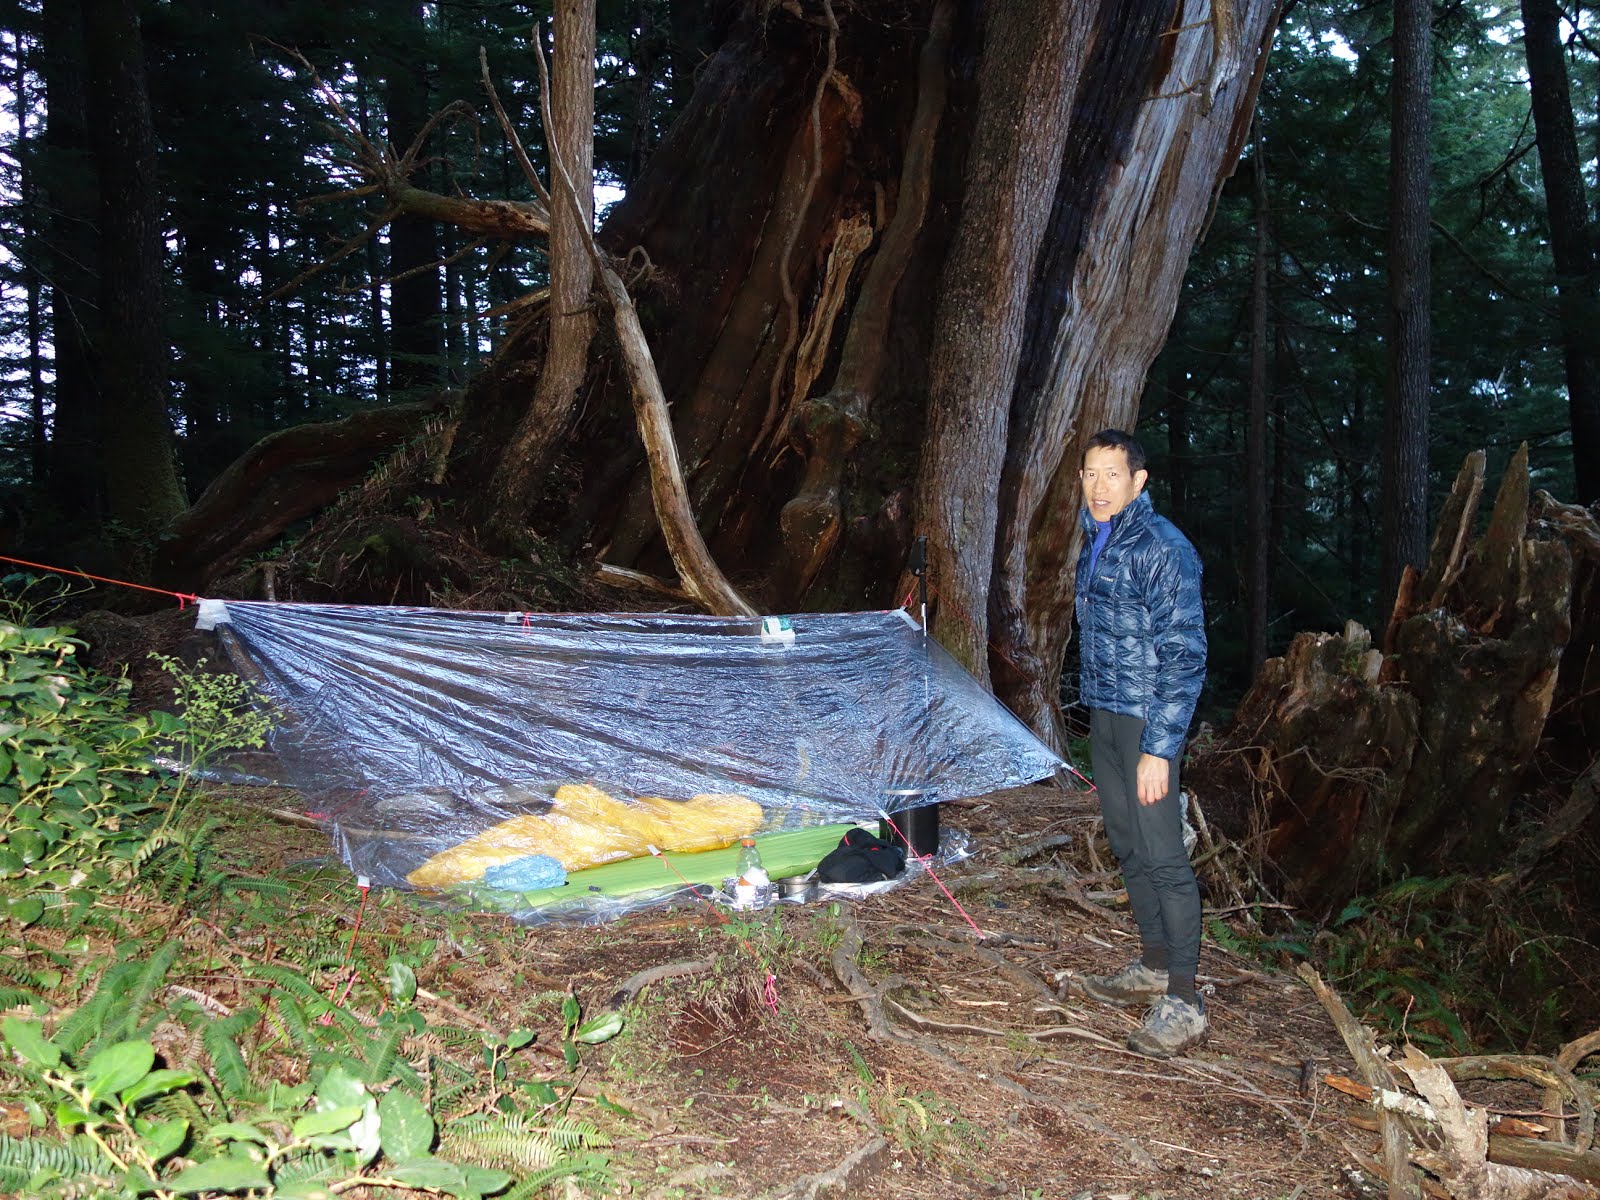 Above: my camp using a 6 oz tarp made from window sealing shrinkwrap size 7’ x 10’. I tucked in at 8 p.m. and awoke at 1, 2, 3, 4, 5 and 6 a.m. I put on my specs each time I awoke to look up at the night sky through the tarp--I was lying under a 7’ wide skylight. In the quilt, I wasn’t cold, but I wasn’t quite warm either. I had straps to pull in the sides of my Rayway quilt, but I lacked a drawstring to keep heat from leaving above my shoulders. A 70’s era watersack I used as a pillow went flat several times during the night.
At 0640 I descended to Falls Creek which ran just low enough for me to dance across en pointe. Not so with knee deep Goodman Creek. Back on the trail, more than once I stepped in sucking mud that flowed over the cuffs of my waterproof shoes. The shoes never dried out--the Goretex liner trapped the water--I’d have to stop and dump water or just keep walking with the extra weight. I got to Mosquito Creek about an hour before high tide, its thigh deep waters and mild current posing no resistance. I met and hiked with Jenny and her daughter, Rachel, sporting matching foot tattoos. Getting over Hoh Head included some rough ropes which made me glad for bringing good gloves. The tattooed women converted me to walking in non-waterproof shoes and convinced me of my error in not bringing my 70's era Frostline short gaiters. I learned to embrace the mud on the trail over Hoh Head.
I planned 3 d/2 n for this trip, but at the end of day 2, I had reached the end and I didn’t want to get back late on Friday before a canoe race. Having forgotten that the trail and road would take me to US 101, the Hoh River had a powerful pull, drawing me to its edge, but Rachel set me straight. I walked the road a mile, coming to a boat ramp where fishermen had just taken out. A fishing guide named Ryan took me & his two clients to Forks. Then the Quillayute Community Shuttle took me to the trailhead. I had luck getting the rides--one can’t know when anyone is driving out from such a remote area.
The map (above) from the trail guide showed Oil City at the southern end of this trail. No oil. No city. Just a handful of homes.
If one has the time, I recommend this trip as an out-and-back from Third Beach rather than as a two car shuttle or one-car-and-hope-for-a-ride. One needs to see the back side of everything one encountered hiking in and maybe spend a few hours taking pictures during sunset/sunrise.
More notes below.
Food: 5 lb for 2.5 days, including some unknown number of meals, beef jerky, trail mix. Not enough water bottles to carry water to camp. Fresh chicken thighs. The red bell pepper: delish. I need to learn low water cooking for pasta. Also need to cook dinner long before reaching camp, wherever that ends up being. Also, barley doesn’t cook quite fast enough.
Pack weight using an REI Flash 62 backpack (3 lb): 27 lb.
Notes to self for future trips:
Eat and drink more, starting with right away! Losing 6 lb after only walking 17 miles isn't healthy.
Print out the All Trails maps
bring 2nd gatorade bottle
replace LifeStraw filter or eliminate filter altogether.
breathable shoes
breathable ankle gaiters to exclude rocks, needles
Cook dinner before reaching camp, wherever that ends up being.
Learn low water cooking for pasta.
The sleeping bag or quilt can do with a pocket for eyeglasses
Go back with John H
Get pictures at sunset of those crazy swirls on the rocks.
Bring a book for long nights!
maybe bring a drysack for the camera for iffy stream crossings.
Gear list:
allergy Benadryl, Zyrtec, oxymetazoline
arm warmers-nylon
bear canister Bearicade
bug dope stick
Camera Sony RX100
Coleman 12 oz Polypropylene cup--from China via Walmart
Compass
eyeglass case
Firestarter: waxed paper
FOOD for trip
fuel, Snow Peak 110 gm, empty weight: 98 gm
gaiters black
GROUNDSHEET poly cro 62" x 105"
hat insulated Mt Whitney hood orange/gray
headlamp BlackDiamond Spot
jacket Montbell Ex Light down
KNIFE Gerber light weight
leg warmers-nylon
lip balm (SPF 15+)
long bottoms Patagonia capilene
map
matches, box Greenlite H2O proof
modified first aid kit
neck warmer-windproof
olive oil for flavor
PACK rain cover coated ripstop
PACK REI Flash 62 M
pack towel 9x25
paper, pencil
personal locator beacon (optional)
pot cozy for EverNew .9L
Pyrethrum soak for debugging apparel
RAIN Rain skirt 1
REI silk one socks for sleeping
SLEEPING RayWay alpine quilt
SLEEPING REI Flash air matt
Slik 500 tripod w/ball head
soap & cleaning pad
spoon plastic Kenyon
Stearns watersack/pillow
stove Snow Peak Giga power
Stuff sack for 0.9 L EverNew Ti
sunglasses
sunscreen cream or stick (SPF 30+)
TARP 7 x 10 poly cro
tent stakes Sorex 6"
tent stakes Sorex 9"
Ti saucepan/lid EverNew .9L
toilet paper: 12 squares of double ply/day
toothbrush/paste, floss
trekking pole BlackDiamond CF each
Umbrella GoLite reflective
Water container Powerade 32 oz
WATER RX iodine, vit C
WATER RX Lifestraw water filter
water: 1 liter
whistle/mirror
Thursday, March 27, 2014
Six Moon Designs Lunar Solo 2011 tarp tent
This tent has two versions defined by support pole length. The instructions for my 2011 tent indicate a 45-47" pole. Newer years take a 49" pole. I have used 49" with mine with no adverse results. No matter the length of the pole, ventilation under calm conditions improves with a little elevation of the side and rear guy loops.
Pros:
I used this shelter in my 10 night 2012 Wonderland trek, a 2013 High Divide 3 night trek, a two night camp at Gem Lake (above Alpental ski resort and past Snow Lake) and a two night Home Sweet Home camp out.
Video above shows set up process
- Quick set-up, six stakes minimum. It has additional pull-outs, but no lines, on each end of the tent to increase head room for the sleeping camper.
- Single pole
- Generous 26 sq ft of floor space, mostly usable, but not for a second person. It's still really a one person tent.
- Generous vestibule that fits pack, boots and allows entry/exit. Even though I'm a fair weather camper, I can see that it would provide enough room to cook in rainy conditions.
- Bug protection
- In conditions where rain falls straight down or from the back side of the tent, the vestibule can stay open for ventilation. I have used it that way in Fall 2013.
- The zipper works well, but the too-short pull tabs have no zipper pulls.
- flexible set-up for weather.
- My 5'8.5" frame fit inside lying down with some space beyond my sleeping bag clad feet and head.
- 24 ounce weight.
- I have enough head room to sit under the peak.
Cons:
- The side and rear stake out lines on mine have thin Grosgrain (the "s" is silent) webbing and ladder buckles which hold, but they neglected to sew a fold on the end of the Grosgrain to keep you from pulling it off.
- Fiddly but effective vestibule tie-up (elastic cord "buttonhole" and plastic bullet button)
- The tent allows you to adjust only the front line while in the tent.
- The siliconized nylon canopy stretches after set up, requiring cinch, which you can't do from inside because of the bug netting. Adding zippers might add 3 ounces.
- The siliconized nylon floor requires some preparation of the floor to reduce slipping around.
- You'll want either a tyvek or poly cro (shrink-to-fit window film) ground cloth as some people hint that the floor isn't completely waterproof.
- You can enter/exit only from the right side of the supporting pole.
- Without the optional side pull loops staked out, you'll have the canopy almost on your face while lying down, especially if you sleep on a lofty air mattress. That would also tend to worsen condensation. You'll need a stake and about 6' of line to raise the canopy on whichever end you choose as the head end of the tent. Another stake and 6' of line will keep the canopy off the foot end of your sleeping bag as you sleep.
- Likely a tight fit if you're over 5'11"
Tuesday, March 25, 2014
Those people in the pool
Who are those Asian women in the Desert Breeze swimming pool? They are all 52 years old, wear a latex cap with chin strap, float or swim laps as if they measured their minutes in geologic time, speak to each other in hushed tones and have much more than 99.9% of their DNA in common.
While walking to the pool from the locker room, and before I could even see the water, I heard a man barking commands as if he were coaching a swim team of a thousand. A fit middle aged man on the pool deck directed elderly women in a water aerobics class. Life happens at the Desert Breeze Aquatic Center.
While walking to the pool from the locker room, and before I could even see the water, I heard a man barking commands as if he were coaching a swim team of a thousand. A fit middle aged man on the pool deck directed elderly women in a water aerobics class. Life happens at the Desert Breeze Aquatic Center.
No money to save the Enchanted Valley Chalet
This story came to me via radio. On the web: http://www.oregonlive.com/travel/index.ssf/2014/03/olympic_national_parks_enchant.html

in this world nothing can be said to be certain, except death and taxes. ---Ben Franklin
I've been there and sat on the splintered wood porch on a sunny, warm September day. The Park Service reserved the building for ranger use and for dire emergencies. I imagine people would pay a fee to stay there, though the cost of maintaining a shelter with four walls, doors and windows could exceed revenues.
Saving it? The Park Service has no $ for this one. History, sure, but at what cost? The wilderness will reclaim its own. Let our $ go to maintaining trails and protecting wild lands.
in this world nothing can be said to be certain, except death and taxes. ---Ben Franklin
I've been there and sat on the splintered wood porch on a sunny, warm September day. The Park Service reserved the building for ranger use and for dire emergencies. I imagine people would pay a fee to stay there, though the cost of maintaining a shelter with four walls, doors and windows could exceed revenues.
Saving it? The Park Service has no $ for this one. History, sure, but at what cost? The wilderness will reclaim its own. Let our $ go to maintaining trails and protecting wild lands.
Saturday, March 22, 2014
yet another Wood-burning stove
I hate these things. I cannot stop making them. I hate the soot that collects on the two saucepans I sacrificed to wood stoves. And most likely, the controlling authority where you'll be camping won't let you use these.
Concept: The gasifying wood burning stove to my knowledge has two parts. The firebox has air holes at the top and the bottom. The heat shield is a box that surrounds that fire box. The heat shield has vents at the bottom to let air into the fire box (primary air source) and up into the space between the fire box and the shield (secondary air source). The picture below from Wikipedia shows how wood gas from partial combustion flows down from the fire and back up between the fire box and the heat shield with secondary air as both warm up and rise between the fire box and the heat shield, moving back into the fire box when it reaches the top. "most of the carbon monoxide produced by gasification is oxidized to carbon dioxide in the secondary combustion cycle." That's the theory.

Instructions on how to build wood gas stoves (some very elegant) abound on the internet. The variant I developed and show here allows modifications after construction, such as adding more air supply holes. Of course, it is so cheap to build that one can simply build more. It consists of two cans which one can find easily in US supermarkets.
Stove construction
Materials:
- Steel tomato can (4" diameter) for heat shield: 104 gm
- Aluminum roof flashing 4.5" x 13.75" to replace tomato can side panels
- Pineapple can for burn chamber (3.5" diameter) with top off: 75 gm
- 2.5" x 12" hardware cloth for pot support
- 3.5" square of hardware cloth for raised floor
Tools:
- Can opener
- Rotary tool (Dremel or Black'n'Decker RTX for budget minded folk) with cut off wheels for cutting cans
- Heavy duty scissors
- drill and bits
- rivet tool and rivets
- ruler
- gloves, ear plugs and protective eye wear when using tools
Process
- Heat shield: remove top of the tomato can and cook/eat contents. weight= 91 gm
- remove label wt=88 gm
- Turn the can so the bottom is now the top. Cut out a 2"circle from the top. wt=82 gm
- remove 4 panels from side of can leaving 4 struts (non load-bearing) wt= 45 gm (If I do this again, I'll remove two panels & delete step 6)
- Place Aluminum roof flashing inside the shield and mark four spots at 3, 6, 9 and 12 o'clock. Cut out air holes at these four spots with the rotary tool. Attach flashing to inside of can with a rivet at the bottom of the can. This will bear the weight of the pot support and the pot with at least a liter of water. Shield wt= 74 gm
- remove two struts Shield wt= 67 gm
- Make fifteen to twenty 1/2" radial cuts from the 2" circle, forming 15-20 tabs

Heat shield with radial cuts on the top. - Bend down every second or third "tab" & remove the other tabs. Heat shield wt= 67 gm
- Cut away the last two struts and the bottom ring of the original tomato can dropping another 11 gm. final weight 56 gm.

Heat shield with tabs bent down and side panels removed - Burn chamber (burn box): remove label from pineapple can wt= 71 gm
- Leave the bottom of the can intact. It will serve as a heat shield to help protect the surface on which you use the stove. Flammables will still
- Make marks at 3, 6, 9 and 12 o'clock near the bottom of the can. Draw a horizontal line about 3/4" long at each mark 1/2" above the bottom. The raised floor will rest at this line. With the Dremel cut four "U"s at the bottom to create tabs to hold the raised floor 1/2" above bottom, bend tabs up. Now cut upside down "U"s at the same marks to create tabs that you can bend down. These should be about 3/4" high and narrower than the tabs that we bent up.
- cut hardware cloth to go inside can as raised floor
- place floor in can on the tabs we bent up in step 11 and bend tabs down to hold the floor. Burn box wt= 74 gm
- Pot support: shape Hardware cloth to fit on top during use and inside the tomato can for transport. Don't try to cut this pot support so that it's smooth where your saucepan will rest on it, because soot will make the more likely to stick to the pan.
- I think you're done. Pot support wt= 15 gm
Total weight 145 gm (5.1 oz), a bit heavy compared to a stove with just the burn box and a simple heavy duty foil heat shield. I suggest you make the burn box with the tomato can and get heavy duty foil for the heat shield. Just keep it simple.
Storage: the pot support goes inside the Heat shield and the burn box goes inside that. It's a bloody tight fit.
Use guidelines:
Place the burn chamber right side up. remove the pot support from inside the heat shield. Place the heat shield over the burn box, such that it is centered--the tabs in step 7 may just reach inside the burn box to help with that. The Heat shield is taller than the burn box. The gap between the tops of the two cans allows the warmed air between the two cans to move into the space over the burn box and mix with the rest of the burned gases over the fire, supposedly to help burn the wood gases more completely.
The same disclaimers as everybody else has applies. Here it is below:
Disclaimer & Warning:
WARNING!!!
Information on this site is provided for educational purposes only.
Neither the webmaster nor anyone else whose information may be included on, or linked to, this web site can attest to or endorse the safety of using any techniques, equipment, supplies or services evaluated or referred to therein. Any endorsement or recommendation is limited solely to the evaluator's opinion about their effectiveness when used for their intended purpose in accordance with safe operating procedures, and if available, in accordance with any instructions provided by the inventor or manufacturer. Some survival and outdoors equipment and supplies are inherently unsafe and can injure, maim or kill even when used appropriately.
Endorsement or recommendation of any equipment, supplies, services or techniques does not constitute a guaranty or warranty the equipment, supplies, services or techniques will function when needed.
Individuals not trained and experienced in use of tools and techniques mentioned on this page should not attempt creating a stove without supervision by someone with proper experience and training.
Wear eye protection whenever flying metal is possible (such as whenever a drill, other power tools, a hammer or knife is used).
Do not light stoves in a area prone to fire, explosion, etc. Do not light stoves without plentiful ventilation.
Use of gasoline, or any other petroleum products in these stoves may result in severe burns and/or death.
The same disclaimers as everybody else has applies. Here it is below:
Disclaimer & Warning:
WARNING!!!
Information on this site is provided for educational purposes only.
Neither the webmaster nor anyone else whose information may be included on, or linked to, this web site can attest to or endorse the safety of using any techniques, equipment, supplies or services evaluated or referred to therein. Any endorsement or recommendation is limited solely to the evaluator's opinion about their effectiveness when used for their intended purpose in accordance with safe operating procedures, and if available, in accordance with any instructions provided by the inventor or manufacturer. Some survival and outdoors equipment and supplies are inherently unsafe and can injure, maim or kill even when used appropriately.
Endorsement or recommendation of any equipment, supplies, services or techniques does not constitute a guaranty or warranty the equipment, supplies, services or techniques will function when needed.
Individuals not trained and experienced in use of tools and techniques mentioned on this page should not attempt creating a stove without supervision by someone with proper experience and training.
Wear eye protection whenever flying metal is possible (such as whenever a drill, other power tools, a hammer or knife is used).
Do not light stoves in a area prone to fire, explosion, etc. Do not light stoves without plentiful ventilation.
Use of gasoline, or any other petroleum products in these stoves may result in severe burns and/or death.
Swim blog: butta'fly
One cannot photograph or otherwise record a feeling that one can re-experience on playback. I have been feeding myself Tylenol, naprosyn and Glucosamine/chondroitin for a few weeks now. That in combination with some physical therapy stretches and strengthening moves have reduced my right shoulder discomfort to where I can commit myself to paddling a good Ski to Sea 2014 race.
The shotgun combo of drugs seemed to help with swimming. I hiked from noon to 2 p.m. with some big hills, came home and napped for three hours. I got to the pool by 5:30, swam a few laps of freestyle and breast stroke sandwiching some kicking laps. I swam a few dolphin kick laps and noticed a feeling that my calf wanted to cramp, which brought me to swim a few dolphin kick laps focusing on just the hip flexion and extension phase, ignoring everything below the knees beyond keeping my feet together. I swam one armed fly, breaking into full stroke by mid length, still focusing on hip flexion as well as timing the hand release with hip flexion. The stroke felt fluid and the energy seemed directed toward forward progress with little vertical motion. I could even swim 50 yards of fly without the usual exhaustion. This had to have been an unrepeatable fluke, but I loved the feeling even knowing that I cannot press "Replay."
The shotgun combo of drugs seemed to help with swimming. I hiked from noon to 2 p.m. with some big hills, came home and napped for three hours. I got to the pool by 5:30, swam a few laps of freestyle and breast stroke sandwiching some kicking laps. I swam a few dolphin kick laps and noticed a feeling that my calf wanted to cramp, which brought me to swim a few dolphin kick laps focusing on just the hip flexion and extension phase, ignoring everything below the knees beyond keeping my feet together. I swam one armed fly, breaking into full stroke by mid length, still focusing on hip flexion as well as timing the hand release with hip flexion. The stroke felt fluid and the energy seemed directed toward forward progress with little vertical motion. I could even swim 50 yards of fly without the usual exhaustion. This had to have been an unrepeatable fluke, but I loved the feeling even knowing that I cannot press "Replay."
Subscribe to:
Posts (Atom)