I've already built this. I'm just showing how I did it. I don't have pictures of the finished rack, because I can't find them anywhere. Just maybe my Verizon cloud account has one that I can download for this blog post. I've dismantled the rack to be used in other projects.
This is the only DIY project I've seen for a roof rack for a sedan that doesn't involve welding, or running a strap into the inside of the car. Undertake this project:
- if you already have some tools
- if you don't trust the products from Yakima or Thule for your car
- If you're cheap like me
- If you just like to tinker, or
- a combination of the above
You need tools:
- Tape measure or yardstick
- Level
- 4' long straight edge
- Power saw or hand saw
- Waterproof wood glue
- Epoxy cement. Wood flour or saw dust to mix the epoxy into a paste.
- 2 boards 1x6x6' I cut each to 1x6x56"--these are your two load boards that will hold lumber, boat mounts, etc. If you want shorter/longer load boards, plan accordingly. Narrower boards may hum more when the wind strikes them. Actual measurement of these boards in cross section: 3/4" x 5.5"
- 2x4 four pieces 5.5" long. These will be the towers that hold your load boards. note about 2x4's: they actually measure 1.5" x 3.5
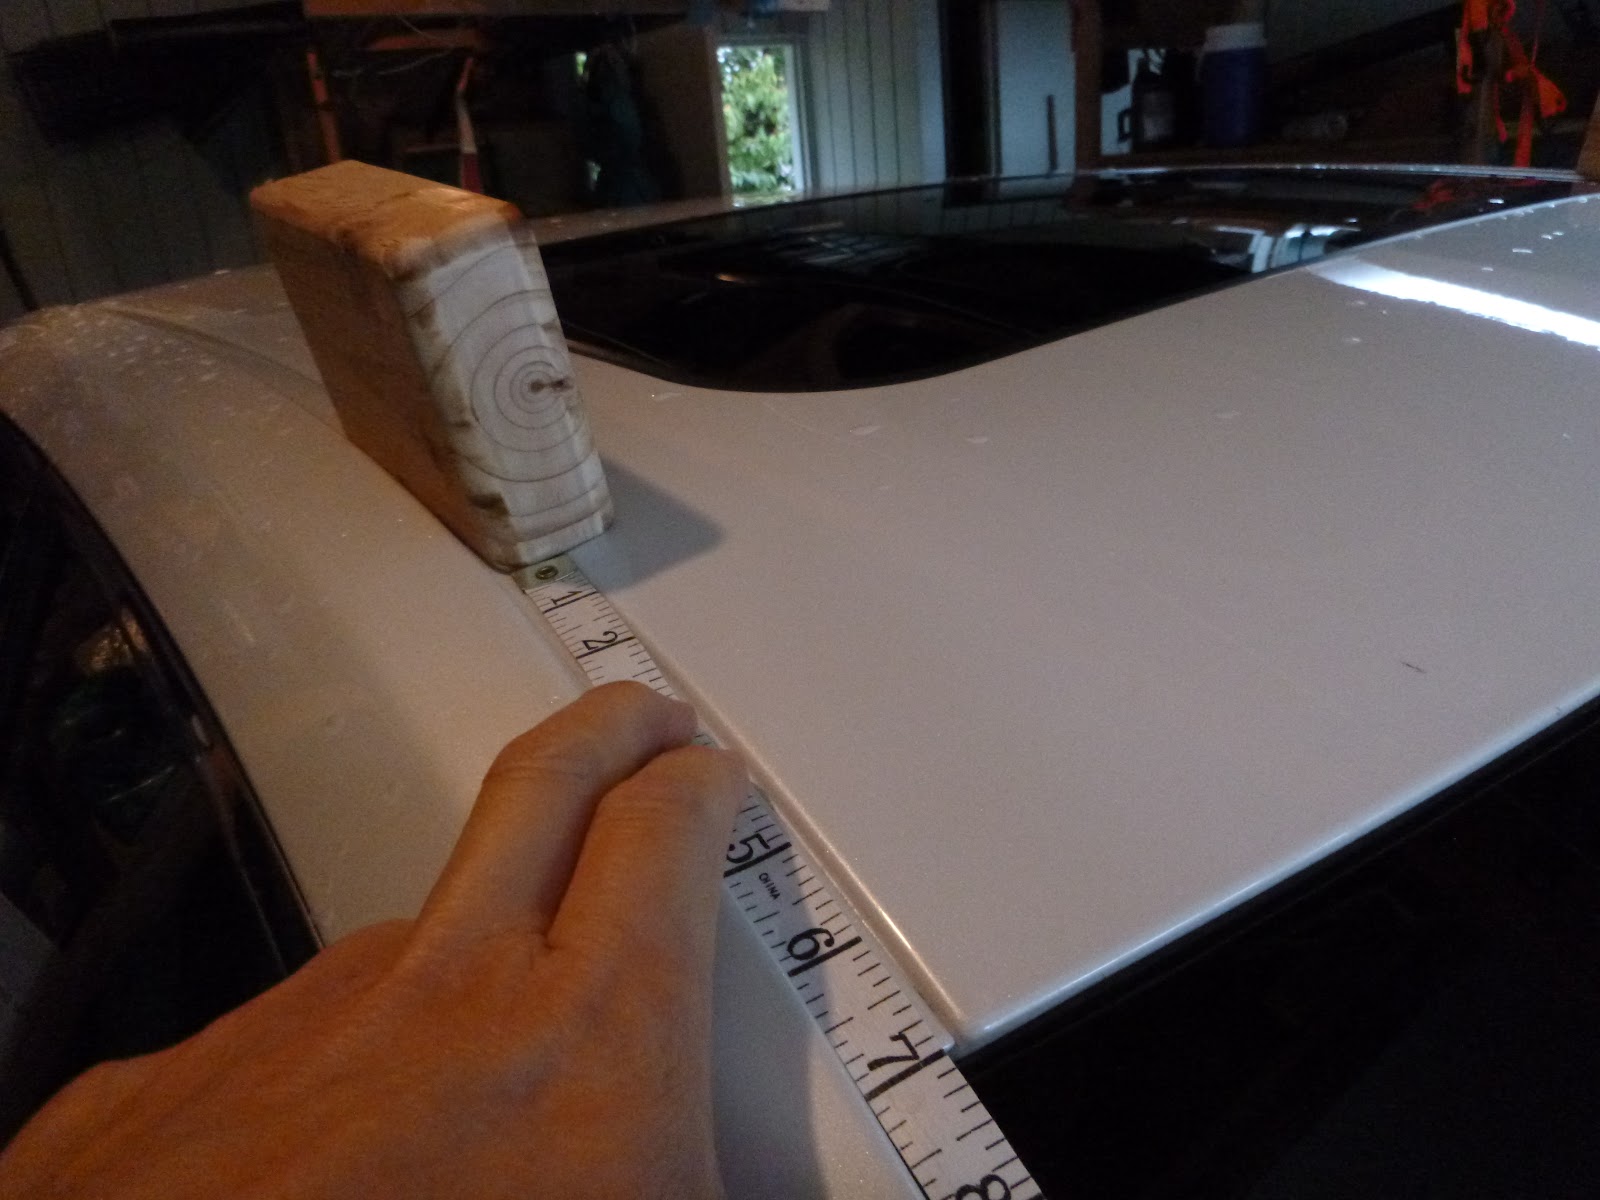
Making the rack towers. Cut 4 lengths of 2x4, 5.5” long. Lay them on the 1.5” x 5.5” side and mark the centers on the top sides.
 Position the 2x4's on
the roof about where you think they might work. The tops of the blocks won't be
level for most cars, nor will they be at the same level from front to
back. Orient
the blocks in line with the
long axis of the car--don't line them up with the roof structure--If you
feel the need to be exact, find the midline of the car and use as a
guide for the rack tower positions. Position them so the front corner of the front tower is level with the rear corner
of the rear tower.
Position the 2x4's on
the roof about where you think they might work. The tops of the blocks won't be
level for most cars, nor will they be at the same level from front to
back. Orient
the blocks in line with the
long axis of the car--don't line them up with the roof structure--If you
feel the need to be exact, find the midline of the car and use as a
guide for the rack tower positions. Position them so the front corner of the front tower is level with the rear corner
of the rear tower.
Trim the bottoms to bring the tops level and in line from left to right--use a level and a pencil. Then trim the tops
to bring them level and in line from front to back. Lay the load boards
across and check for contact. It doesn't have to be exact--then, shape the towers for aerodynamics.

 |
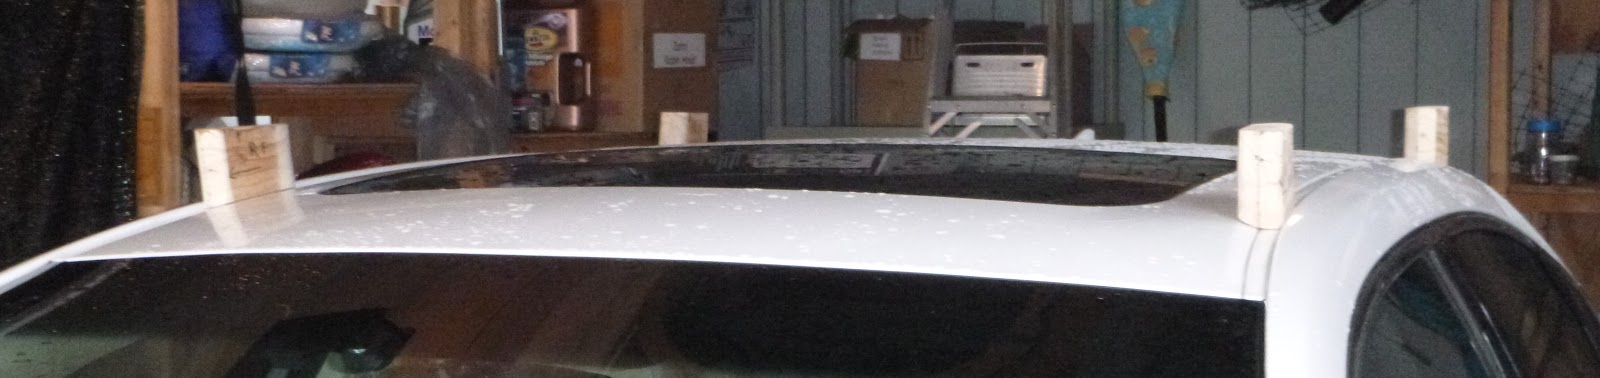
| In this photo, the tops of the front blocks don't line up with the tops of the rear blocks. The front corner of the front block is slightly lower than the rear corner of the rear block. |
 |
| On my 2013 Toyota Avalon, the bow pieces go 7.75” from the windshield and the front end of the stern pieces trail the front end of the bow pieces by 39.5" I didn't align the block (as shown above) with a structural element of the roof because it might have made trimming it more complex. |
 |
| This shows the alignment of the front block after completion. The difference may be subtle and may not matter, but I wanted as little as possible to mess with the build. |
 |
| All four blocks mostly shaped for prime time. |
 |
| This is one of the blocks after reshaping for the roof configuration. |
 |
| The rear blocks after shaping. The straightedge shows that I've shaped it about right. |
Measure the distance from left to right of the front pair (42.75" for my Avalon) and then of the rear pair (42").
Front rack Subtract 1/4" from the 42.75" separating the towers as measured above= 42.5" Subtract 42.5" from the length of the load board 56" =13.5", divide the result by 2 = 6.75" Measure 6.75" from one end of the load board and mark, and make marks 3/4" on each side of that, then on the other end of the board 42.5" away, make similar marks to these. Cement the towers using those marks--use epoxy thickened with wood flour/sawdust.
 |
| Epoxy mixed with wood flour. Thick enough not to sag. |
Rear rack Subtract 1/4" from the 42" separating the towers as measured above= 41.75" Subtract 41.75" from the length of the load board 56" =14.25", divide the result by 2 = 7.125" Make a mark 7.125" from one end of the load board and make marks 3/4" on each side of that, then make similar marks 41.75" from those. Cement the rear towers to those marks.
Let the epoxy cure indoors, overnight. Clean up spilled epoxy immediately with a rag and vinegar.
Aluminum attachment clips and bolt:
Each assembly attaches to the car with a bolt and clip scheme. The clip is riveted to a stiffener plate that hangs from the load board. The clip bends at the bottom end to conform to the door jam. The bolt runs through the rack tower horizontally and through the clip. .

Bolt length. The bolt should be stainless steel for my part of the country, but it can be zinc plated for Las Vegas or Phoenix. It can be a threaded rod with nuts and washers or a carriage bolt. I placed the front assembly on the car in the position described above, 7.75" behind the windshield. I placed the back assembly 34" behind the front. The measurements for the threaded rod used to attach the door clips: the distance from the tower to the point above the car door jamb plus 1.5" for the thickness of the tower. Add 3/8" for a nut and washer on the medial side of the tower. Add 1" for a nut, a washer and a hold-open length to hold the clip in position against the car. For the front of my Toyota, 3" + 1.5" + 3/8" +1" = 5 7/8". I'm using 1/4" stainless threaded rod. I haven't looked for a 6" long carriage bolt Rear bolt: 3 11/16 +1.5 + 1" = 6 3/16"
Clip length. I used an app on my phone called Clinometer to find the angle I would need to bend the clip to match the sheet metal of the car's door jamb where it turns in. Use a protractor and a level to find this angle if your phone can't do that. The clip mounts to the load board in a vertical position. Clip material: 1/16x1.25 aluminum. About 5/8" will extend past the end of the thick piece and will be bent to follow the door jamb. Both Front & Rear clips are 4" before bending.


Clip stiffener: 1/8"x 1.25" aluminum. length: Front: 4.5" I could not achieve the 90 degree bend at the top end in my home shop safely & easily. I cut a 1" long chunk of this 1 in. x 1/8 in. Aluminum Angle Bar in lieu of bending:

Oops, the aluminum flexes. maybe time for steel or plywood.
The whole project has been cancelled, due to my ;replacing the car for my dream car, a Tesla Model S.
No comments:
Post a Comment