Making a diy Topspin Pro for Tom.
The Topspin Pro is a great tool for adding topspin to tennis groundstrokes. I bought one for myself using Ryan Reidy’s affiliate link, but thought I could make a second one from stuff laying around the shop for my brother Tom (a Topspin Bro!). A paint roller handle holds a tennis ball that spins on impact; the handle can swing forward when the ball is struck. The square tube inserts into one leg (a round tube) of a tripod and can be adjusted up or down.
Materials:
Square 1" aluminum tube
24" PVC pipe (1.5") that fits over the aluminum tube
3-4"paint roller handle
44" ¾" PVC pipe
Epoxy (Bondo auto body filler, though really stinky, might work)
The tripod section of the stand. The main section is hollow so that it can accept the square tube holding the ball. I'm using 1.5" PVC/ABS pipe because I already have 1" aluminum square tubing that slides right in.
Making the tripod: make a 3" long x 3" wide x 3" high cardboard box. Cut a hole on each end using the pipe as a template. The hole should be ¼" above the bottom. Cut three sides of the box in half horizontally across the holes and one side. Fold the uncut side at the cut. Mix thickened epoxy and fill the box to halfway up the holes. Use sandpaper or a file to roughen up the surface of the pipe at one end for 5". Lay the end of the pipe in the box with 1-1.5" sticking out. Fold the uncut side of the box over the tube and tape in place.
For the holes to accommodate the other legs (¾" PVC) of the tripod you can use two coupling joints or one corner joint. Modify the joint angle by cutting and trimming. Target angle is about 45-50 degrees. Use PVC cement to glue the pieces together.

Above: two coupling joints cut at 22.5° and glued together

I made another cut on the coupling joints to improve the fit of the tripod joint
The joint will be imbedded in epoxy on top of the large tripod section in the box. Before doing that, use sandpaper to roughen the part of the joint that will be imbedded.
Add thickened epoxy to near the top of the box. Press in the corner joint at the desired angle (60-65 degrees).

Above: Imbedded in epoxy are the sockets for the 2nd and 3rd legs of the tripod. The epoxy has graphite mixed in, so its color matches the tube.
A large mass such as seen here will get very hot, and in larger masses, hot enough to combust. I removed it to the front porch, just in case.
Preparing the tripod leg for the ball holder.
That ball holder is an aluminum square tube that fits loosely in the leg.

Sand the inside of the tube at the top for 2-3" down. Tape cardboard spacers to the aluminum tube so it fits snuggly in the tripod leg.
Next, a few layers of plastic bag go over the ball holder tube.
The aluminum tube goes back into the large tripod leg with an inch or two of the plastic showing. Next, thickened epoxy goes into the gap between the plastic and the tripod leg. The ball holder tube should remove easily after the epoxy cures, leaving a square hole.
The small tripod legs need weight at the bottom to keep the Topspin Bro from moving after impact. For each leg I made a plastic lined paper sleeve about 8 inches long and about 1.5" square. I filled each with about 250-300g of epoxy. One collapsed into the yogurt container holding it. I advise the use of cardboard, not paper for the mold. Better yet, use a 500 ml disposable water bottle with the top cut off.
The tennis ball: Wrap a 10" strip of paper around the ball. Mark the strip where it begins to overlap itself. Cut off and discard the part that overlaps. Hold the ends together and cut a notch as seen in the pictures below. Mark the ball with a sharpie. Holding the paper on the ball, center the end notches around the mark. Turn the ball and mark the ball through the center notch.

Above: the strip of paper wrapped around the ball and marked where the end touches.
Above: "X" marks the section to cut away
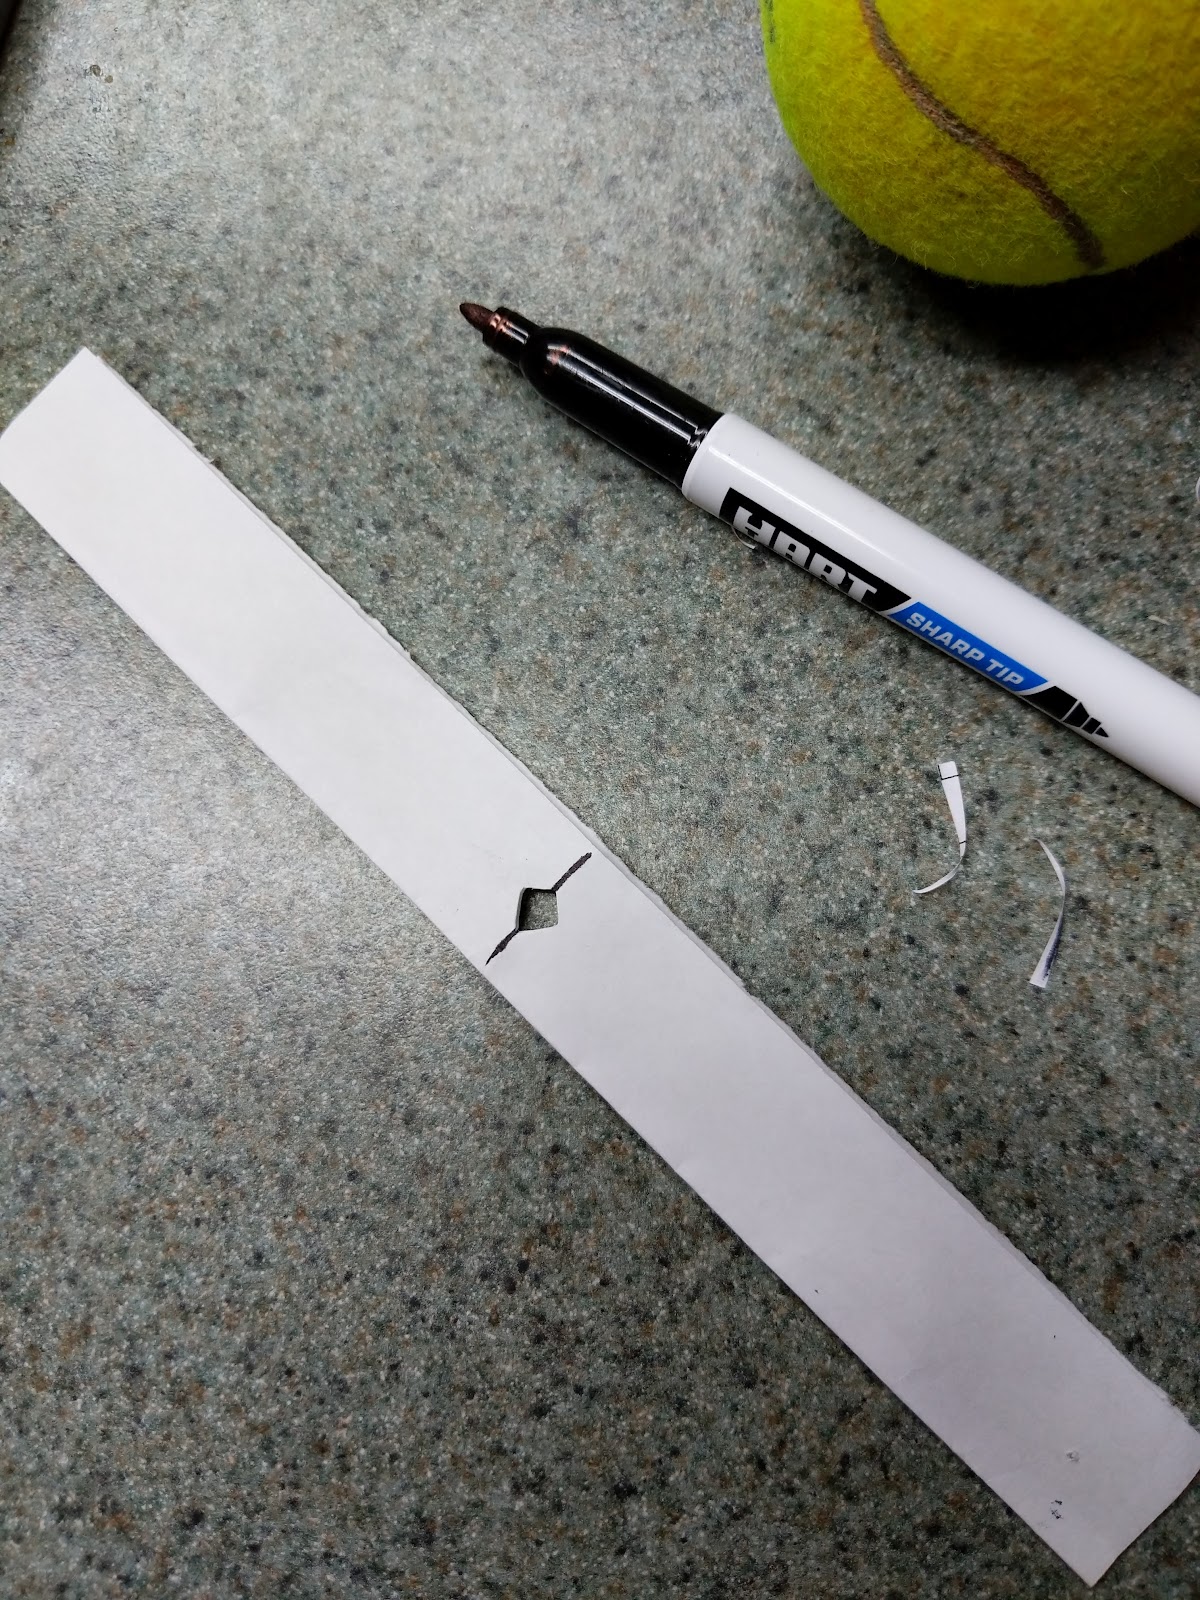
Above: I located the center by folding the strip in half and marking it. Then I cut a square hole at the fold.

Above: I notched the ends of the strip. Here it encircles a mark on the ball.

Above: This is the center mark. I marked it. To check my work, I turned the paper 90° and found the marks to land within the notches of the paper strip.
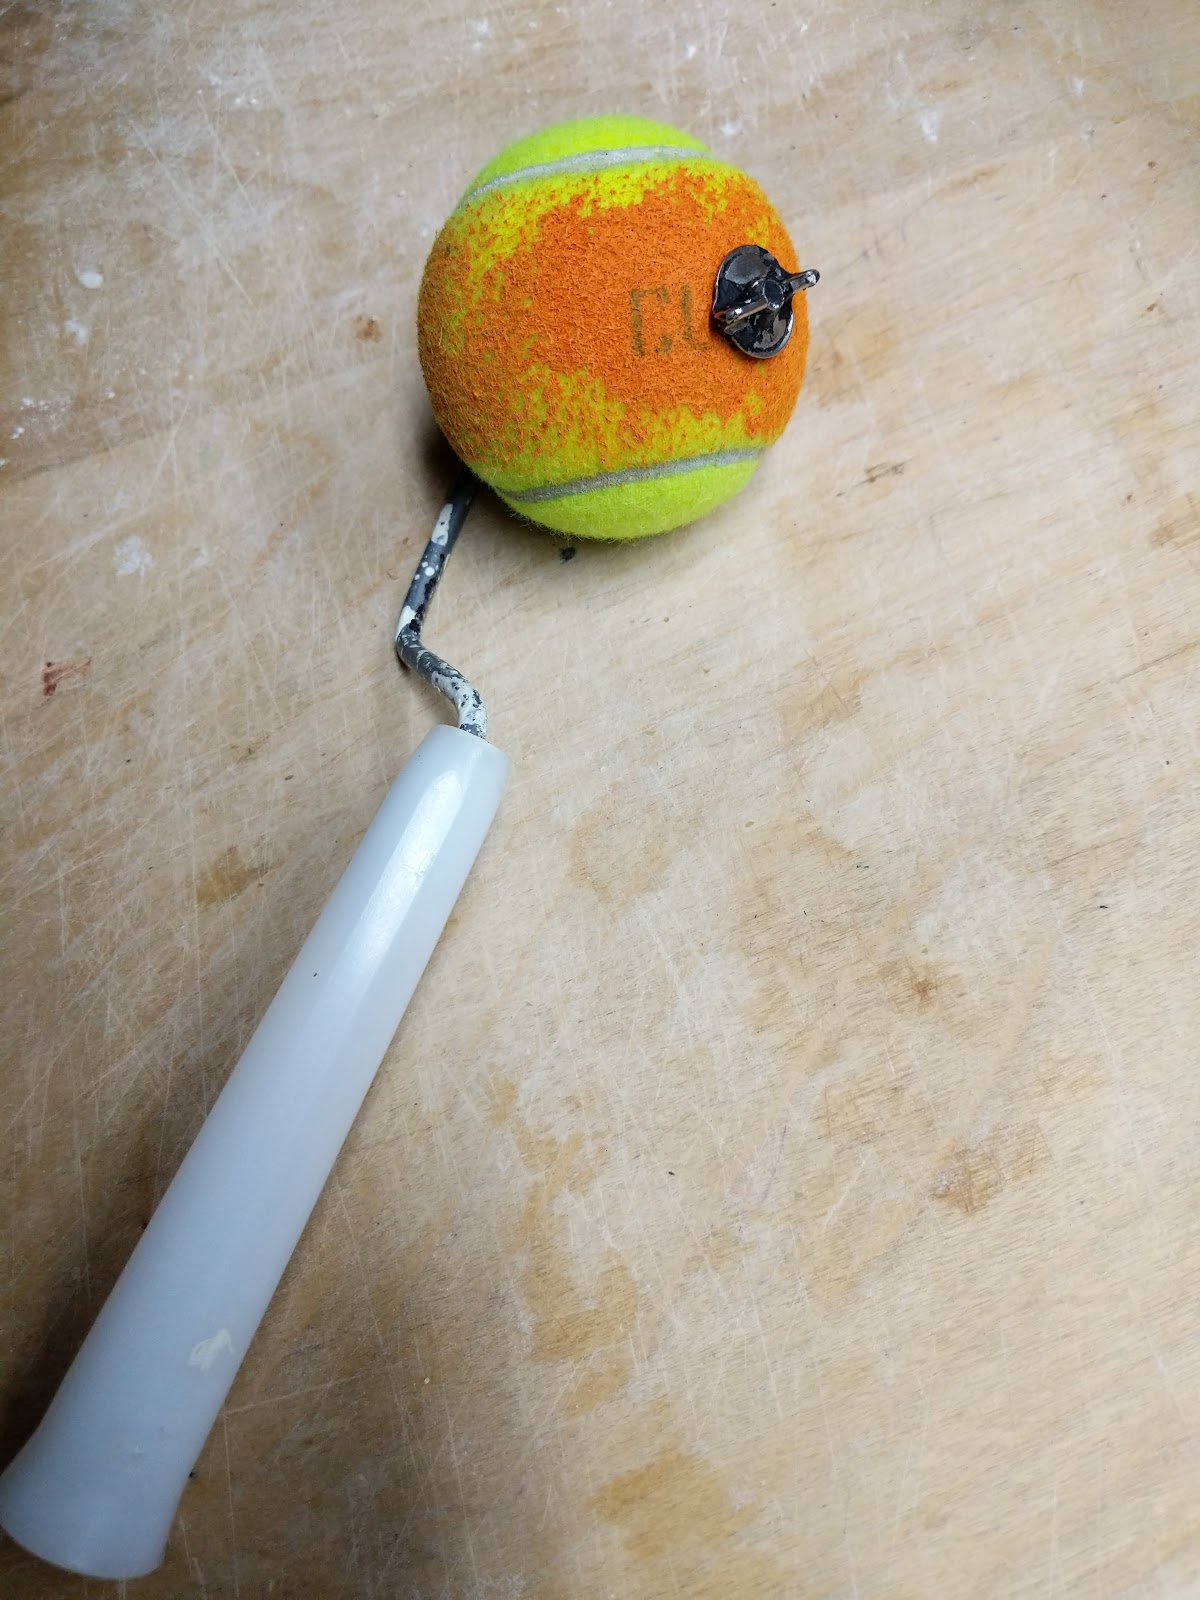
Check the locations of the marks by turning the paper 90°. Drill a ¼-5/16” hole at each mark. Find a metal or plastic tube that fits loosely over the business end of a 3-4" paint roller handle. Press the tube through the ball's holes and trim to fit the handle. Slide the ball onto the handle. It should spin easily with minimal wobble. If the handle doesn't come with an endcap to keep the ball in place, drill an undersized hole in a small flat of plastic and push onto the handle.
Noc
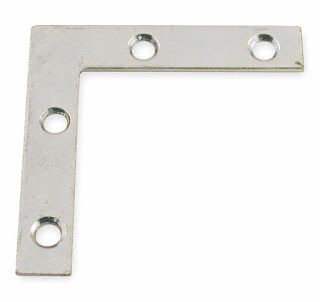
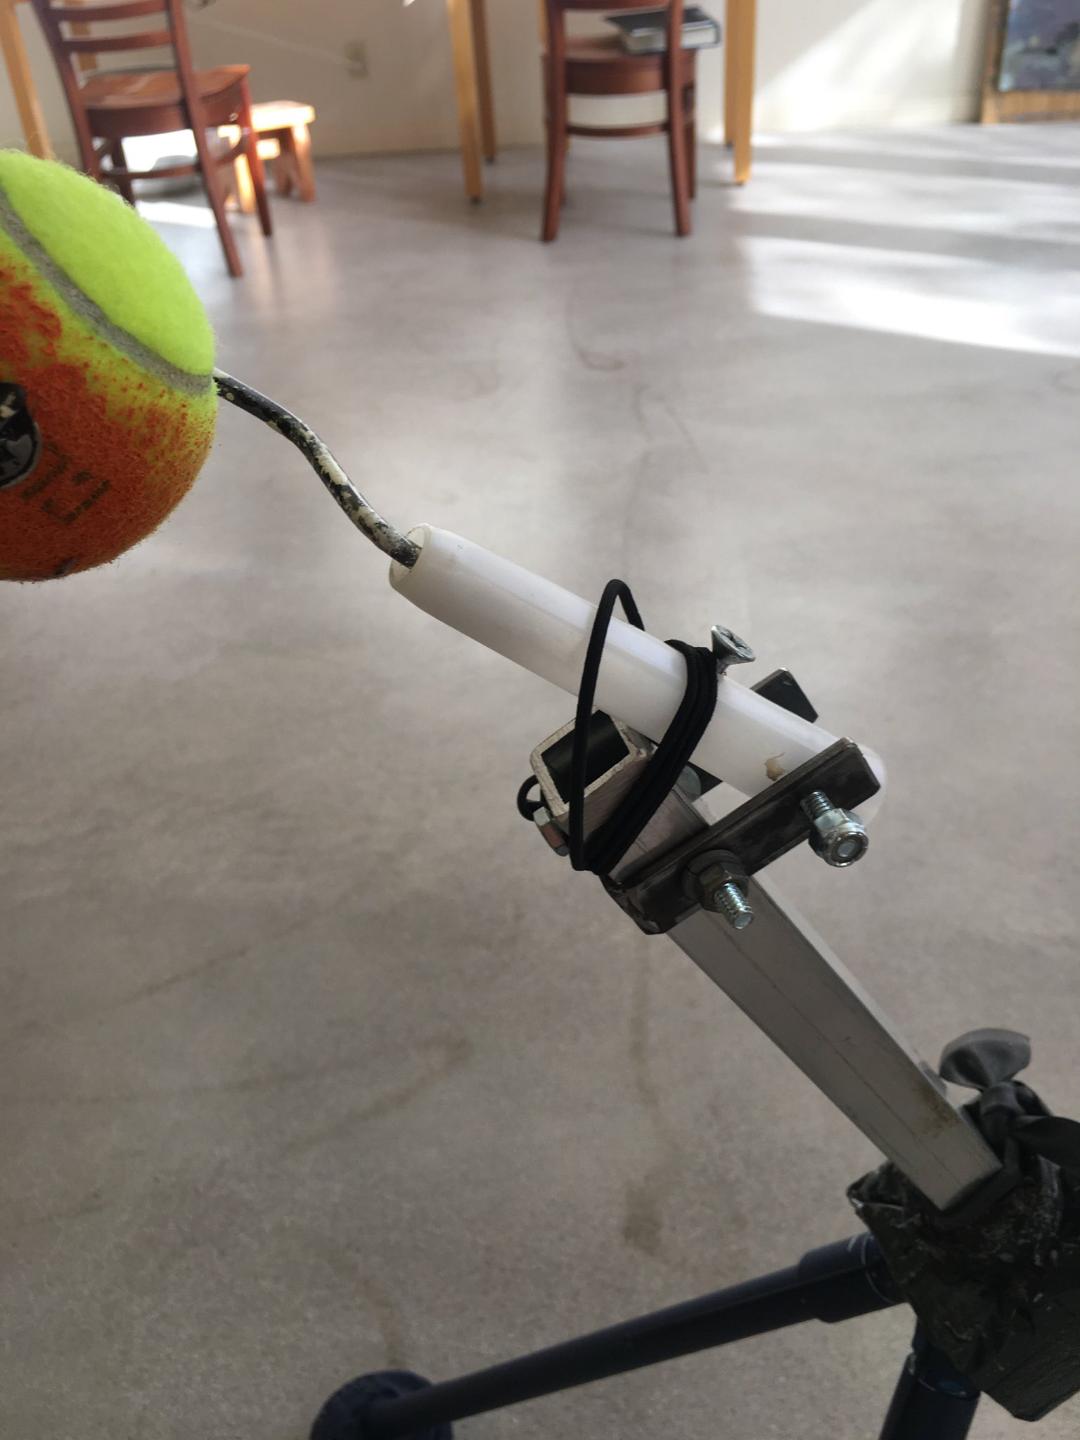
Attaching the ball holder to the sliding tube. Fabricating the ball holder bracket. I bent a 6” strip of steel to fit about the ball holder. Holes drilled to permit bolting onto the ball holder. A hole drilled in the handle of the ball holder and bolted to the sliding tube.

Spring loading the ball holder. 3/32” shock cord, held in place passively by a bolt on both the sliding tube and there ball holder.
Height adjustment. You can make infinite adjustments with a 12 inch strip of cut inner tube wrapped and knotted around the sliding tube. It slides easily up and down, and prevents the tube from sliding into the leg.
The tripod’s detachable legs. Needed: ¾” PVC pipe and 2 coupling joints;PVC cement; drill/drill bits; 3/32” (or ⅛”) shock cord. Cement a coupling joint to the two PVC tripod legs. Drill a ⅛” (or 3/16”) hole at the top of those legs, starting at 90° to get the hole started and then pointing toward the open end of the coupling. Cut two 20” PVC pieces and insert each into the coupling joints. Start a ⅛” hole 8” below the joint and finish by pointing the drill toward joint. Cut 20”of shock cord. Push one end through the t upper hole and the other end through the lower hole. Pull the PVC leg away from the joint, exposing the ends of the shock cord. Pull the ends of the shock together, stretching the cord. Knot the ends of the cord. Move the knot to the bottom end.
Now that the legs are linked to the tripod, hitting the ball won't cause the legs to fall out.
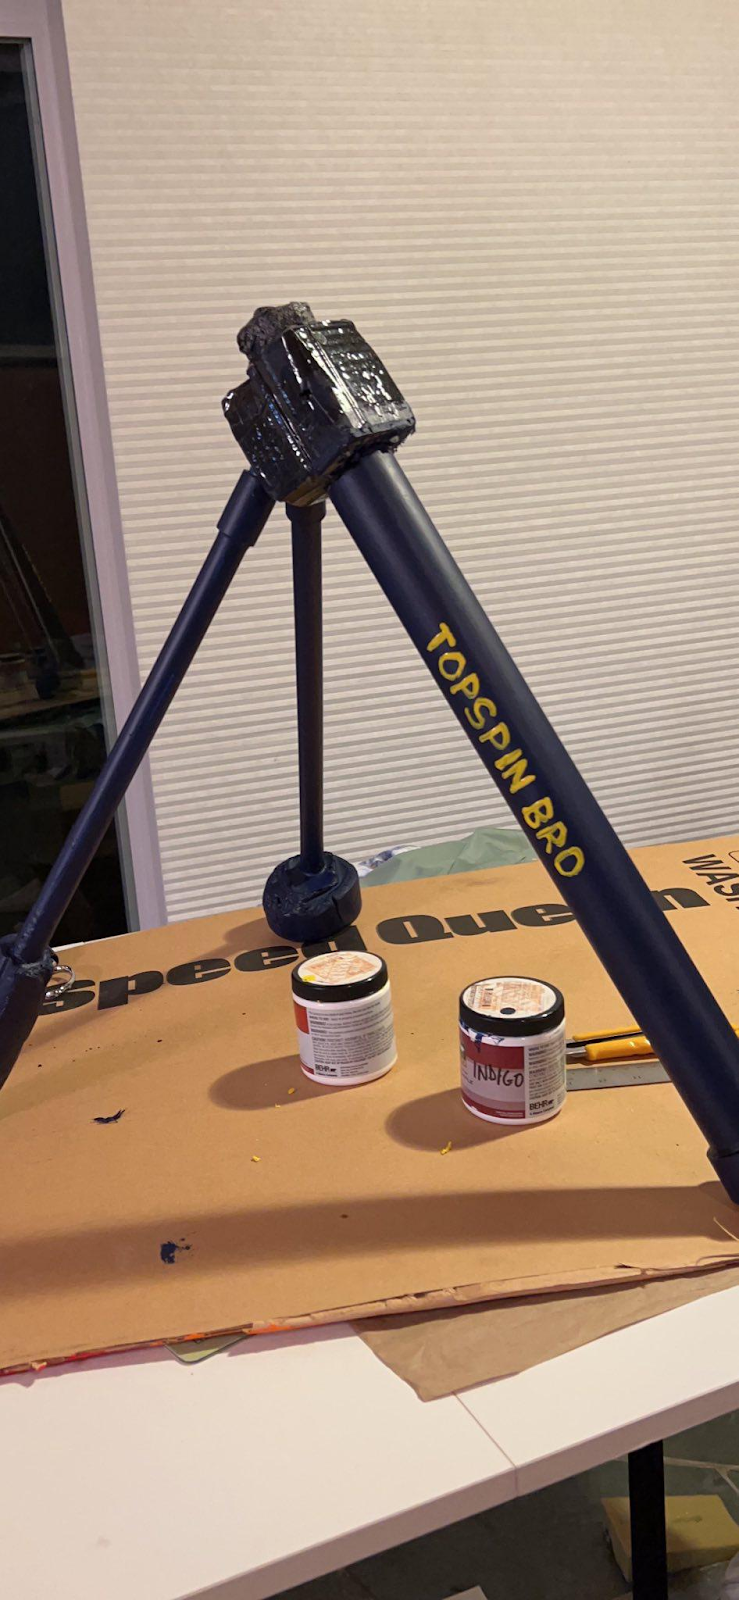
Below, a picture of the tripod.
Below: the ball holder with shock cord attached
The completed thing
